What is teeth whitening?
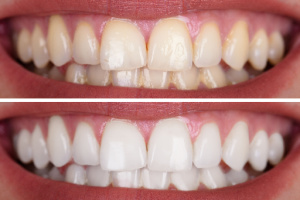
Teeth whitening is a method of removing stains from the surface of teeth. It can be achieved without toothpaste, with a teeth-whitening agent or strips. It is also possible to have teeth whitened as part of professional dental care. The teeth-whitening agent used is a chemical that removes the natural discoloration of teeth.
Process of teeth whitening
 Teeth whitening takes anywhere from a few visits to the dentist up to six months. Most teeth whitening procedures require a series of treatments over a period of time, with at least one dental appointment each week.
Some dentists may offer pressure-sensitive teeth-whitening products that can be applied at home. The process is typically painless except for the first treatment, where some sensitivity is common.
The main aspect of teeth whitening is to remove surface stains by bleaching. A combination of a bleaching agent and hydrogen peroxide can be used. The bleaching agent reacts with the stains causing them to fade away. Hydrogen peroxide is used because it causes the tooth enamel to lighten up and matches the color of your teeth.
Benefits of Teeth Whitening
There are a number of benefits to having white teeth. They include:
I. Improved appearance.
Having white teeth makes you appear more confident, outgoing, healthy and clean. Additionally, improved appearance can have an impact on your job performance and help you earn more money. The appearance of your teeth can make a better first impression when speaking to someone. For example, if you are a sales person, your appearance can make a difference in whether or not the customer decides to buy from you.
II. Improved Health
Going to the Torrance dentist for teeth whitening can improve your health as well. Teeth that are not cleaned properly can allow harmful bacteria to enter the bloodstream. This can lead to serious health complications and possible death. Having whiter and healthier teeth will help you prevent that from happening.
III. Increased confidence
Having white teeth can help with your confidence level in both personal and professional situations. Having whiter teeth is an indicator that you work hard on maintaining your appearance and care for your body overall. Confidence is important in the workplace and will help you get more assignments, and promotions and retain your customers.
IV. Increased self-esteem
Having whiter teeth can also improve your self-esteem. Having a more confident appearance can give you increased self-esteem and make you feel better about yourself. This will help with working independently as well because you have confidence in yourself which makes it easier to work alone.
V. Improved oral health
By removing stains from your teeth, you improve oral hygiene as well. Teeth that are more stained have more buildup and cause bad breath. Having whiter teeth will improve your overall oral health and decrease the amount of plaque buildup.
Who is it For?
Teeth whitening is for anyone whose teeth are discolored. This includes smokers, tea drinkers, those who consume a lot of coffee, and even those who drink red wine. Teeth discoloration can also be caused by medications or certain supplements.
Teeth whitening is a great way to improve your appearance and improve your health. By removing stains from your teeth, you make yourself look healthier and more attractive. This can lead to better job performance and increase your income. It is also a good way to boost your self-esteem and improve your confidence level. Your confidence will make it easier for you to go about life by yourself and make decisions independently.
 When professional teeth cleaning isn’t enough to remove tartar completely and/or your gums bleed when you brush or floss – it’s time for another form of teeth cleaning called scaling. Scaling is the removal of tartar that’s built up below the gum line that brushing and flossing can’t remove. A dental scaling service is important because tartar can only be removed in a dentist’s office.
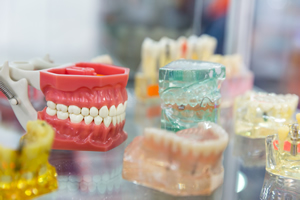 Dentures are a removable dental appliance that can replace missing teeth. They are made of acrylic or plastic, and fit over your gums. Dentures can get used to restore your smile and improve your quality of life. There are different types of dentures, so it is important to consult with your dentist at
 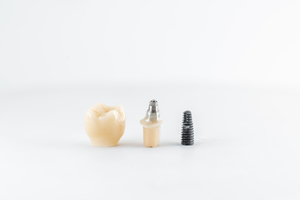 Unlike bridges, crowns and dentures, dental implants are effective and a long-term solution for people who suffer from chronic dental problems, missing teeth and failing teeth. The titanium implant fixture fuses to the jaw’s living bone cells, making the dental implants feel comfortable and secure.
 Dental crowns are full-coverage restorations that fully encase the length of a tooth, usually made out of porcelain or metal. They are used to restore teeth with large cavities or maintain original tooth structure following endodontic therapy (root canal). Dental crowns are also placed over implants. Dental crown placement can repair large cavities, fractured teeth and strengthen the teeth.
 The term “cosmetic dentistry” is often used interchangeably with “smile design,” but the two terms are not synonymous. Smile design comprises all treatment that enhances your appearance, including bleaching or attaching crowns, while cosmetic dentistry encompasses surgical and non-surgical techniques to improve your oral health. Treatment can range from changing the color of one tooth to an entire smile makeover where teeth are straightened, aligned, and whitened.